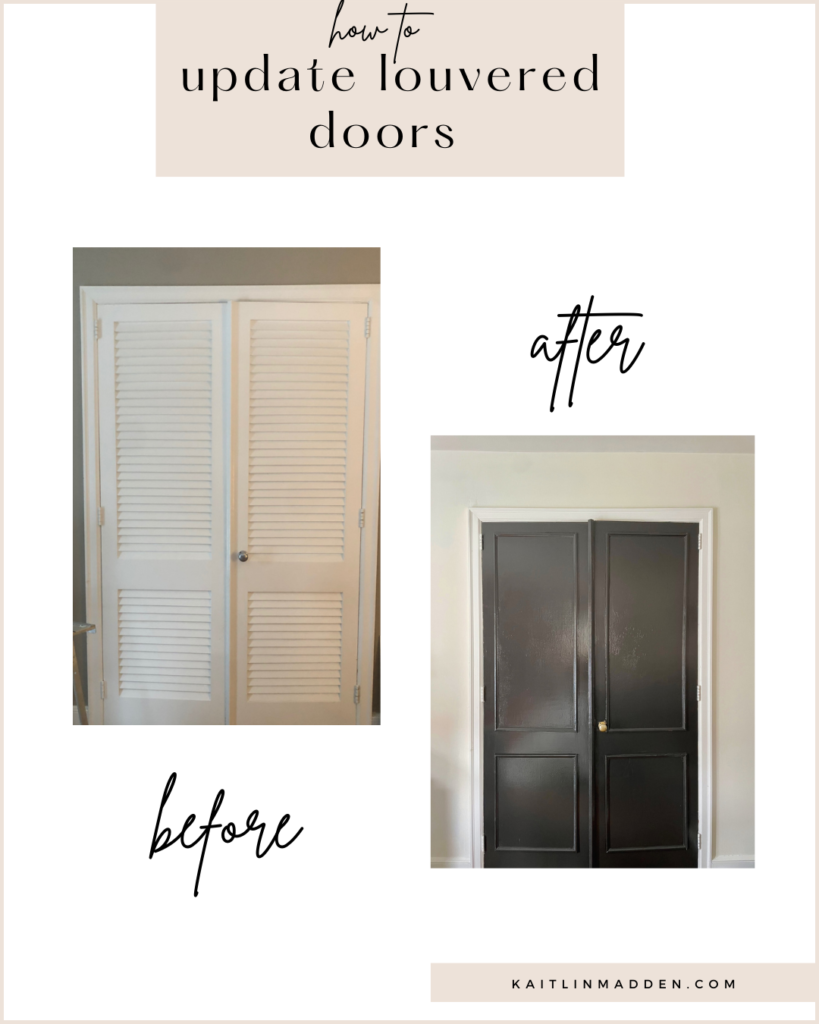
How To Update Louvered Doors for Under $100
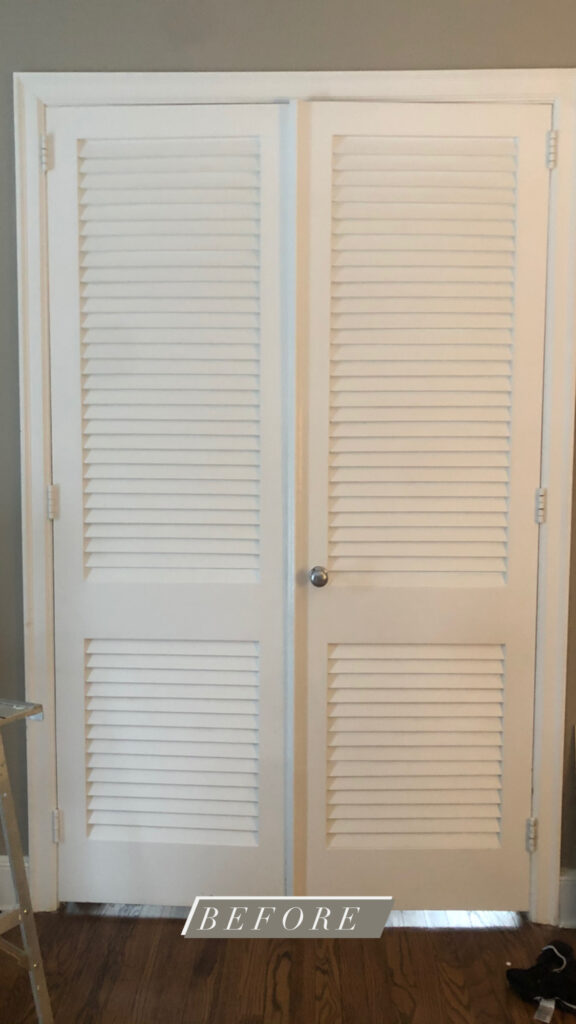
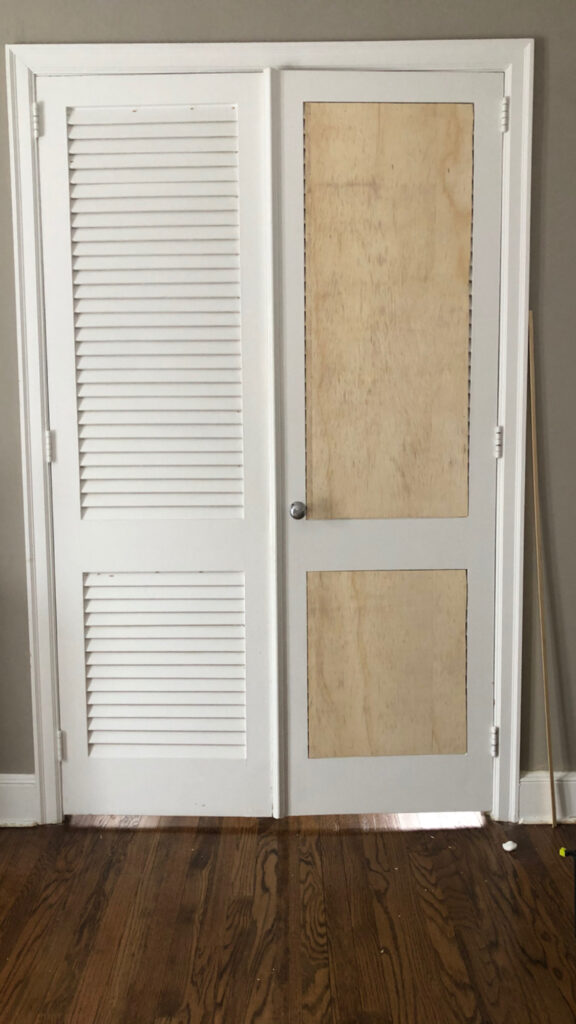
After we finished our closet remodel a few years ago, there was one thing that still didn’t feel quite right about the whole thing: the dated louvered doors that were the entry to the closet. The rest of the space was new and fresh, which made the doors seem even more out of place. Plus, our closet doubles as my home office, so the old louvered doors were a daily backdrop for my Zoom calls.
Originally, I’d wanted to replace the doors altogether. But after doing some searching I realized that the doors I liked would cost upwards of $700 for a pair, so I decided to just live with my ugly doors. Then I saw the most genius Instagram photo pop up from someone who’d updated louvered doors with wood paneling, a project that cost just a few hundred dollars. Literally that weekend I was at Home Depot picking up my supplies.
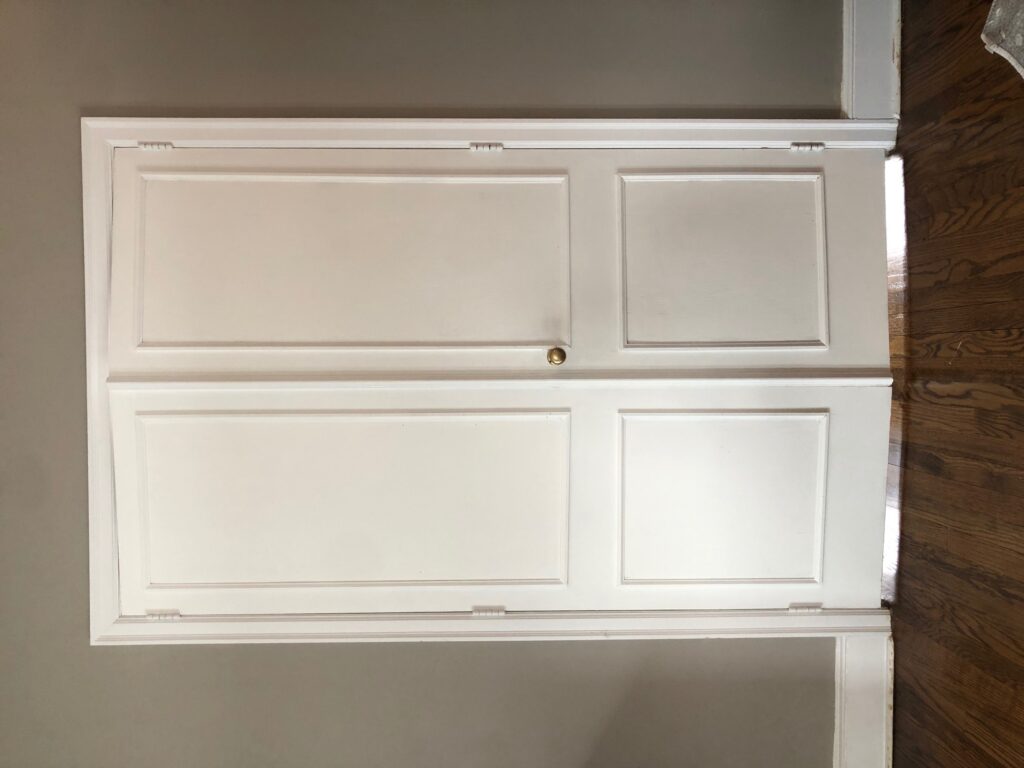
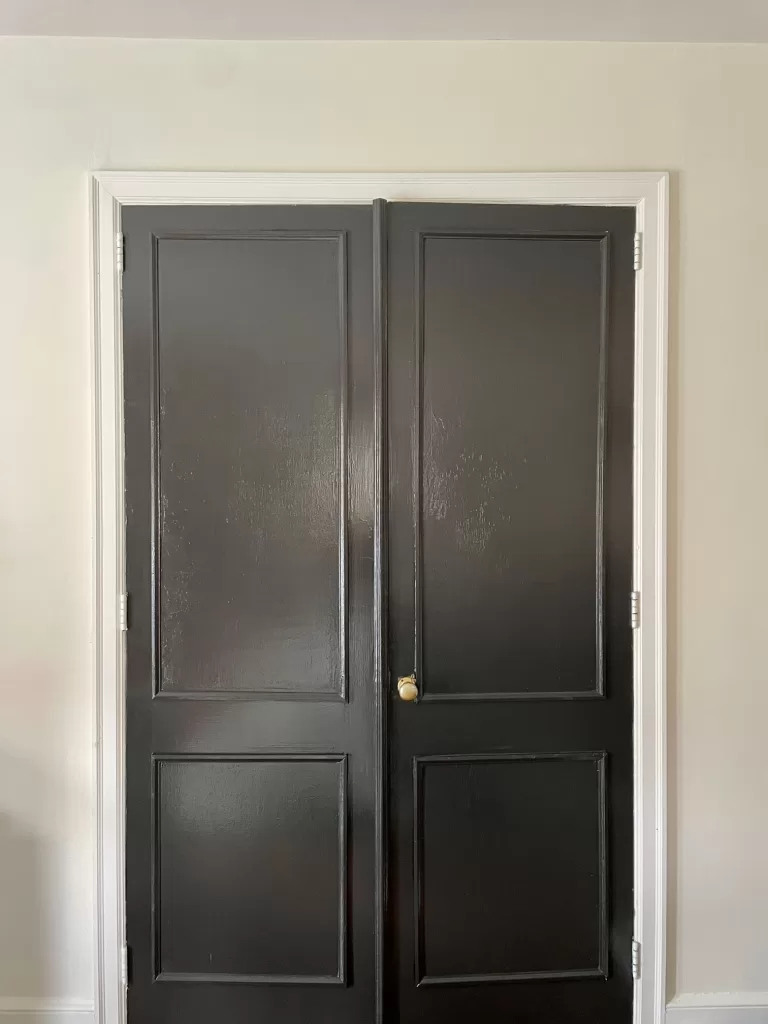
The whole louvered door transformation not only looks just as good as the doors I wanted to buy, but it cost under $100 (including an extra $15 I had to spend on additional trim after I cut a few pieces the wrong way).
This easy DIY is definitely the way to go if you have louvered doors in your house that are currently an eyesore.
Here’s a look at how we did this project, what we needed, and what it cost.
- Want more budget design ideas? See how I decorated our old cottage with budget farmhouse decor
How to Update Louvered Doors
You’ll need:
- A miter saw (or a hand saw and miter box, or this nifty little miter cutter tool from Amazon)
- A circular or table saw (or have your panels cut for you at Home Depot, tips on that in Step 3)
- Sandpaper
- A nail gun or brad nailer (I have this one from Ryobi & love it because it doesn’t require an air compressor)
- Brad nails (3/4″)
- A level
- A measuring tape
- .25″ plywood, enough to cover the louvered sections of your doors
- Wood wall trim
- Painter’s caulk to fill any nail holes/trim cracks
- Primer (or paint/primer in one)
- Paint
The process
Step 1: Measure the Louvered Areas
To start, I measured the louvered panels on our doors so I knew how much plywood and trim to buy. (Tip: Try to get the measurements as exact as possible, then shave off an eighth to a quarter of an inch from each measurement. This will ensure your boards fit inside the panels, and the trim will cover up any gaps around the edges.) I then noted the measurements in my phone for later.
Next, I measured the outside edges of the louvered panels for my trim, again noting the length and width for later.
Step 2: Shop
Then I went to Home Depot to buy my supplies.
I found a simple wood trim piece in the wall trim section of the lumber area. It came in 11′ lengths, which I sawed in half so they fit in my car.
I ended up buying a few plywood sheets, which I had trimmed down to the correct width so I had to do fewer cuts at home. Home Depot is always willing to trim large wood panels for you so that they’ll fit in your car, so I always try and have my cuts made to the sizes I need. It doesn’t always work though, especially if they’re busy. The Home Depot I went to was busy when I went so I ended up finishing the cuts at home.
A lumber yard is also a good bet for getting precision cuts, or you can actually order custom-cut lumber on the Home Depot website.
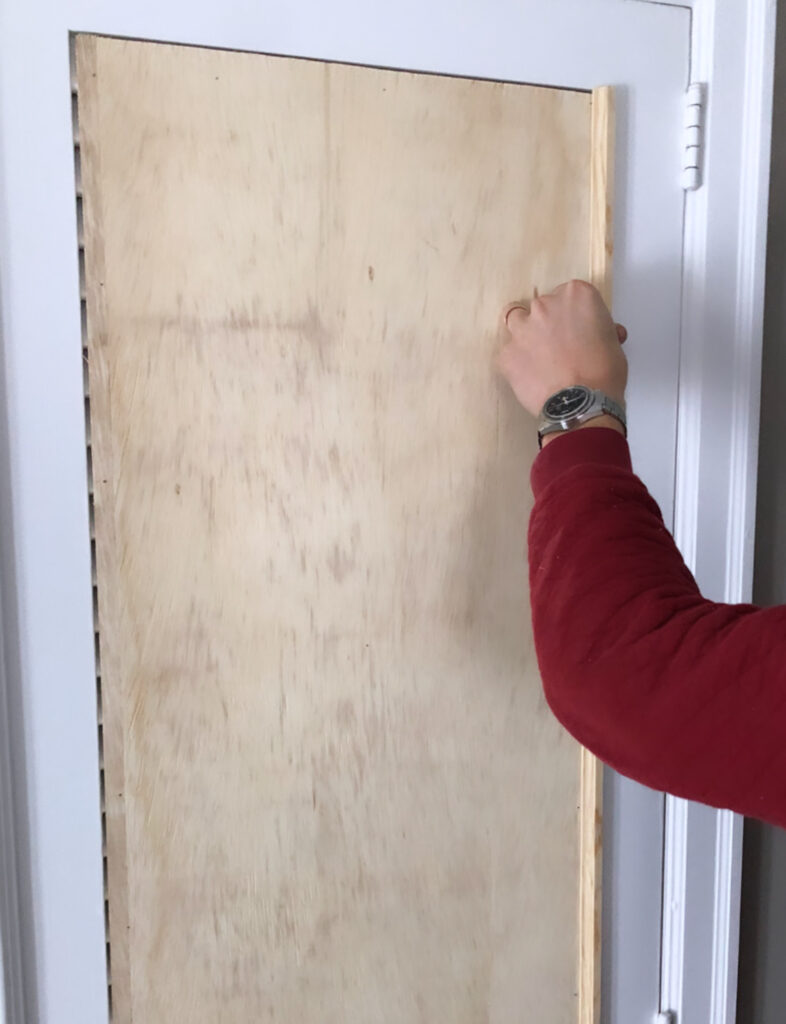
Step 3: Cut the plywood panels
When we got the wood home, my husband cut it to size with a circular saw. A table saw probably would have worked better, but we don’t have one. The circular saw worked fine, but some of the edges were a bit rough, so I lightly sanded them.
Step 4: Nail the panels to the door
We used a brad nailer to nail the plywood panels to the door. We used 1″ long nails, which were a bit too long so some of the stuck out the other side of the door. It ended up being fine because we paneled both sides of the doors, but if you only plan to do one side of your door, use a shorter brad nail, or angle your nails so they go into the door frame, not the louvered parts.
Step 5: Cut the trim
Once the panels were attached, we held one of the trim pieces in place to see where we needed to cut it, and I marked lines with a pencil. After my husband cut one horizontal piece and one vertical piece, I brought the two piece upstairs to make sure the fit was right before moving on to the rest of the cuts. When we had the measurements right, we marked and cut the rest of the trim pieces using the first two as a template.
We opted for mitered corners, cut at a 45 degree angle.
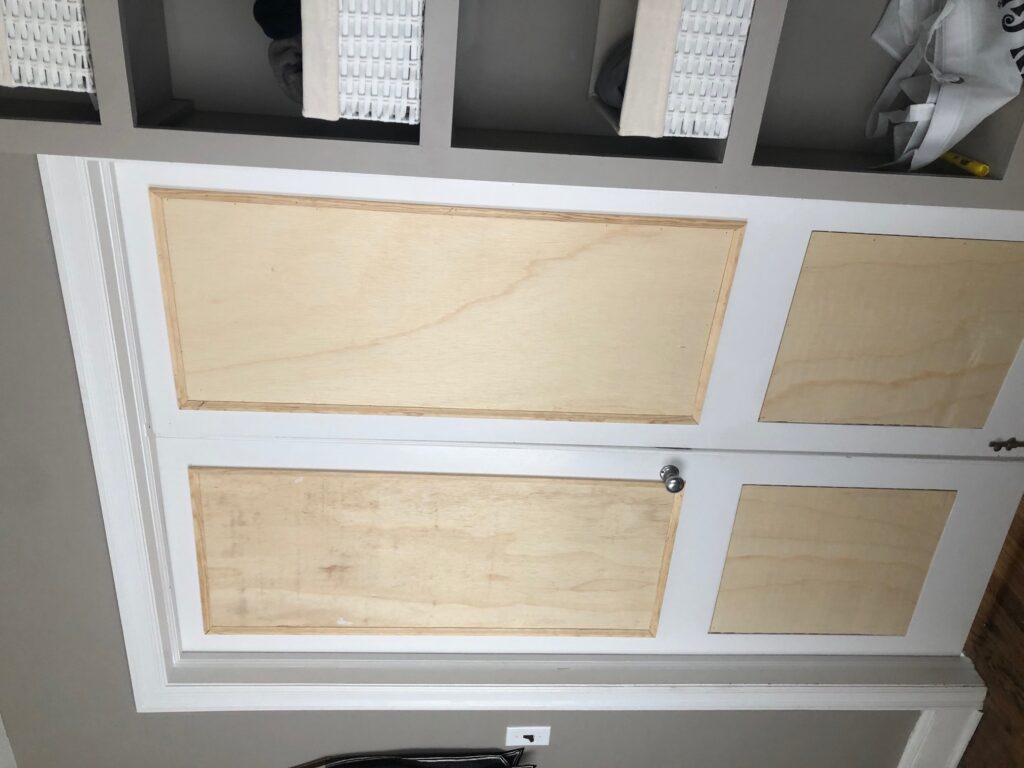
One note about the trim! Remember when I said I messed up some of the trim cuts and had to buy more? It was because I made the very dumb mistake of not holding each trim piece in the same direction when I marked it for cutting. There was a thick side of the trim and a thin side, and when I was marking, I didn’t have all of the pieces facing the same direction, so some of the angles were cut the opposite way that they should have been. So, just make sure that if your trim isn’t symmetrical, you hold it all the same way before you mark it.
Step 6: Nail the trim
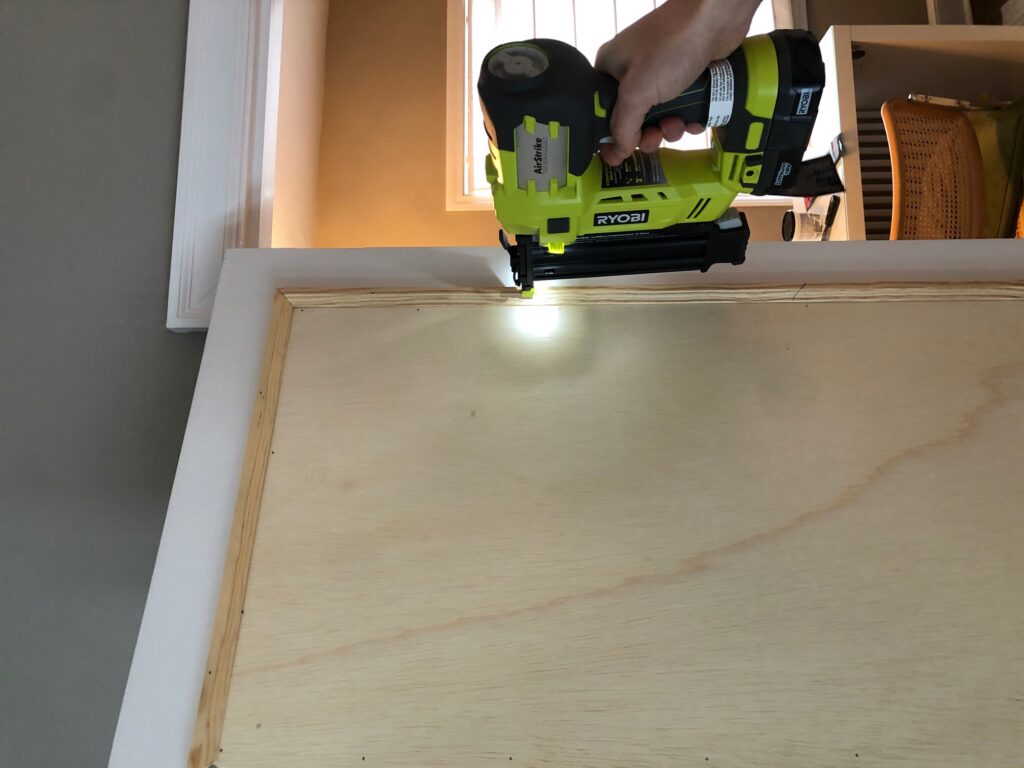
Using the nail gun, we attached the time around the outer edges of the panels, and used a level to make sure each piece was even. I eyeballed where each trim piece would go and it turned out fine, but if you’re particular, you can also measure from the edge of the door to make sure each piece is in the same spot.
Step 7: Caulk, prime & paint
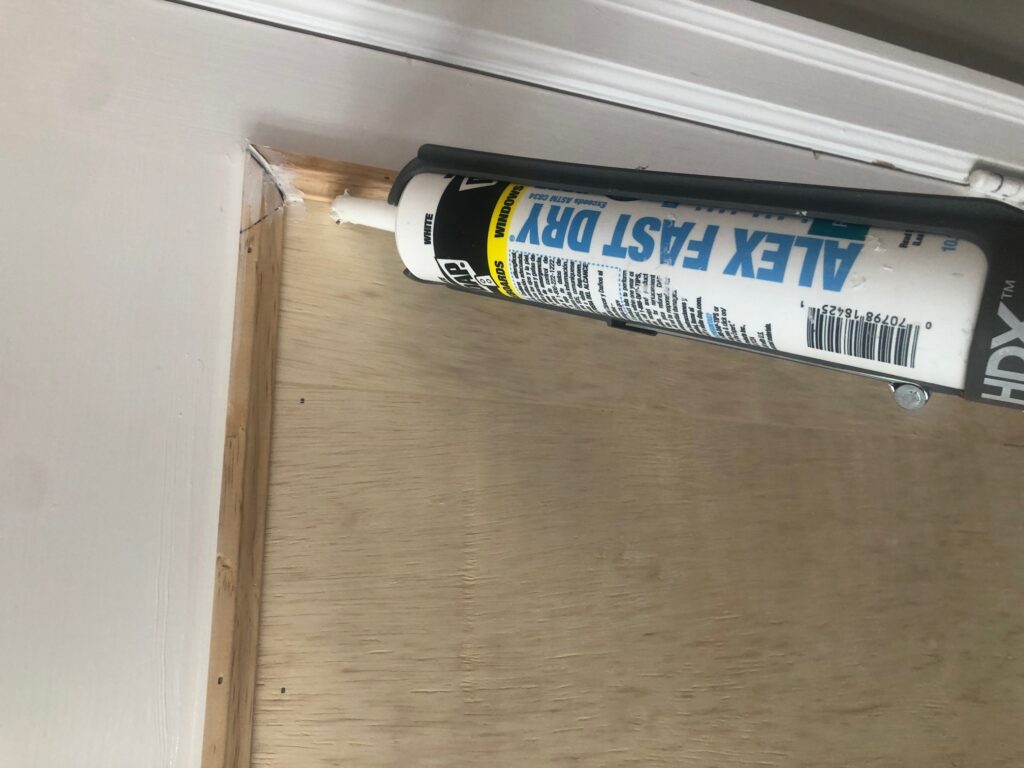
I ended up using painter’s caulk I already had to fill in the cracks between the trim pieces and the door, where the trim pieces met, and any nail holes. Once that was dry, I sanded the caulk down, primed and painted the door, also using paint we already had. I opted for a separate paint and primer (instead of a two-in-one) because I was painting raw wood, but if you buy pre-primed wood you can go straight to the paint.
That’s it!
Pin to save this project for later: