Before & After: Our Teeny Kids Bathroom Update
I’ve mentioned here before that when we moved into our house, all three of the bathrooms were a horror show. I mean maybe that’s a little dramatic, but they were all pretty darn ugly. In my head, I was going to have them all renovated and sparkly new within five years, but we’re closing in on year seven and I just got around to updating our tiny upstairs bathroom which all three of our kids share.
(If you’re curious, the other two bathrooms have also gotten facelifts … one that was a DIY job and will eventually get a real reno, and another that was demo’ed and turned into a powder room).
It was one of those ‘If you Give a Mouse a Cookie’ remodeling projects that happens when something breaks. What do I mean by that? Well. in this case, the toilet started leaking, and. was past the point of repair, so we were going to have to get a plumber to come out and install a new one. And if the plumber was going to come out and install a new toilet, we might as well have him install a new vanity too .And while we were replacing the vanity, we might as well add some beadboard. And whlle we were installing beadboard .. you get the idea.
But! This kids bathroom really, really needed a little TLC. Out of all the rooms in our home, this one was the most untouched. It’s embarrassing. But, let’s take a peek:

Would you like to save this?

Overall, the project was largely cosmetic. We replaced the toilet, vanity, faucet, lighting and mirror, but kept the floor tile, shower tile, and shower fixtures. I also added new accessories (like the towel bar and hooks, and toilet paper holder) and we took out the old frosted shower doors and added a shower curtain.
The inspiration for the reno came from the vanity. Since it’s a tiny bathroom (did I mention that?) we needed to find a vanity that was just 24″ wide. I also wanted something with some storage. I rounded up 3 options, and let my kids pick the one they liked best. They chose this cute green option, which I also loved, from Wayfair.

I liked the beadboard detail on the front of the vanity, and thought it would be nice to add beadboard in the bathroom, and then painted it to match the vanity. So, I took on of the vanity drawer-fronts to Home Depot and has paint color matched, and it went from there!
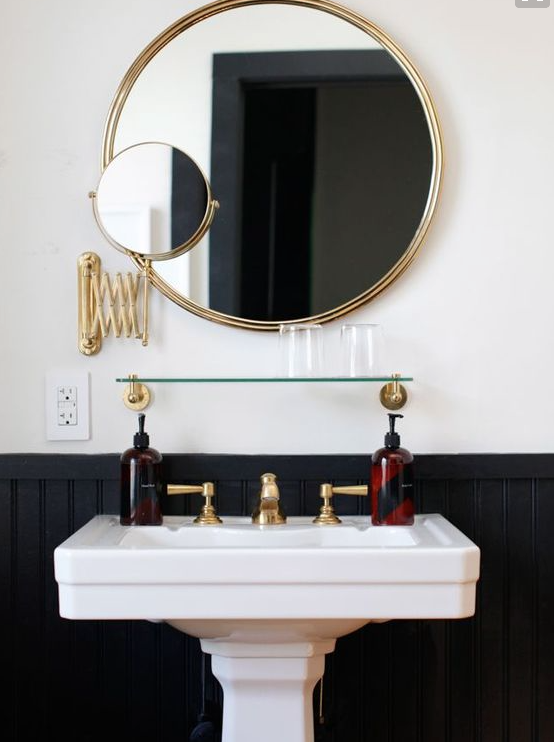
I wanted the space to feel classic and timeless, so I went with an unlaquered brass light fixture from Rejuvenation, a vintage mirror, a polished brass faucet, and a vintage rug to round it out. For the final touch, I added some wall art that we already had at home, and got some new striped towels from HomeGoods … and this is where we ended up!


Shop the space:

I was only able to get 2 good photos because the room is literally that small! But there’s not much more to see here, TBH.
If I have more time, I will probably add a shelf over the toilet and hang some baskets from it, and I’d love to eventually re-tile the shower, but that’s probably a year to two out.
Overall, I think It came out cute! It’s not the most dramatic before-and-after, but it does go to show that you don’t have to gut a room, even a kitchen or bathroom, to make the space more modern and functional.

I love the update!