
DIY Marble Countertops: How-to, Costs, & My Review
I first saw DIY marble countertops a few years ago when I wrote a story about them for a magazine I worked for. The photos of the finished product looked so good, and I always wondered if the faux marble countertop would look as good in real life.
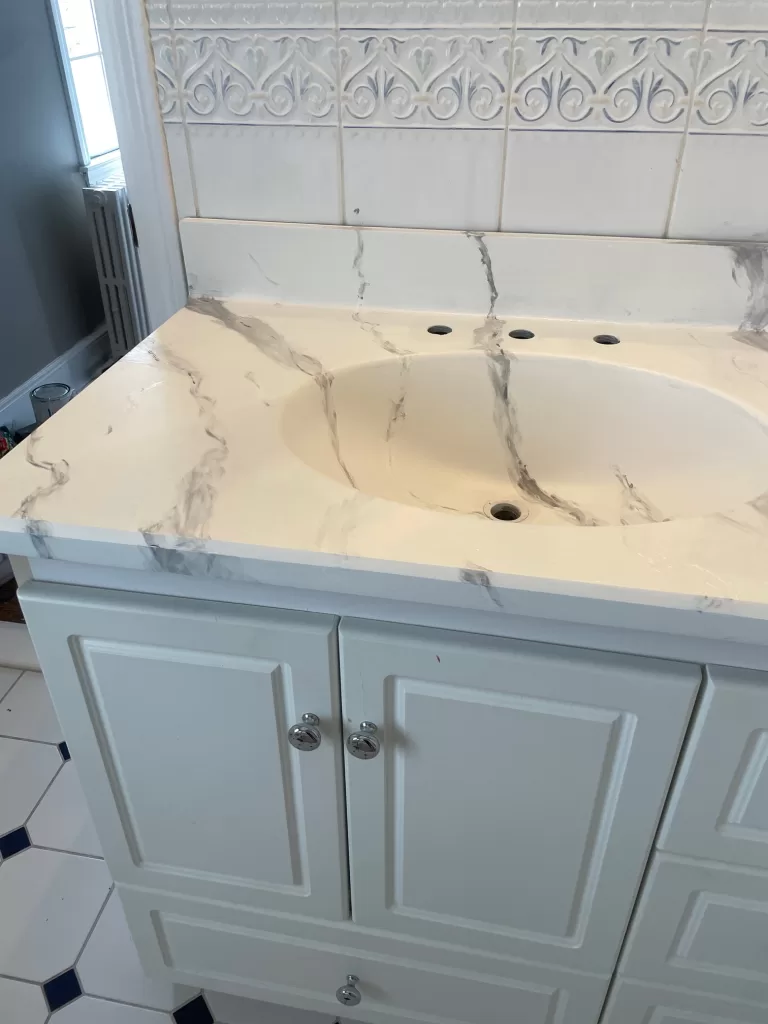
Enter: My no demo bathroom reno, AKA my One Room Challenge project.
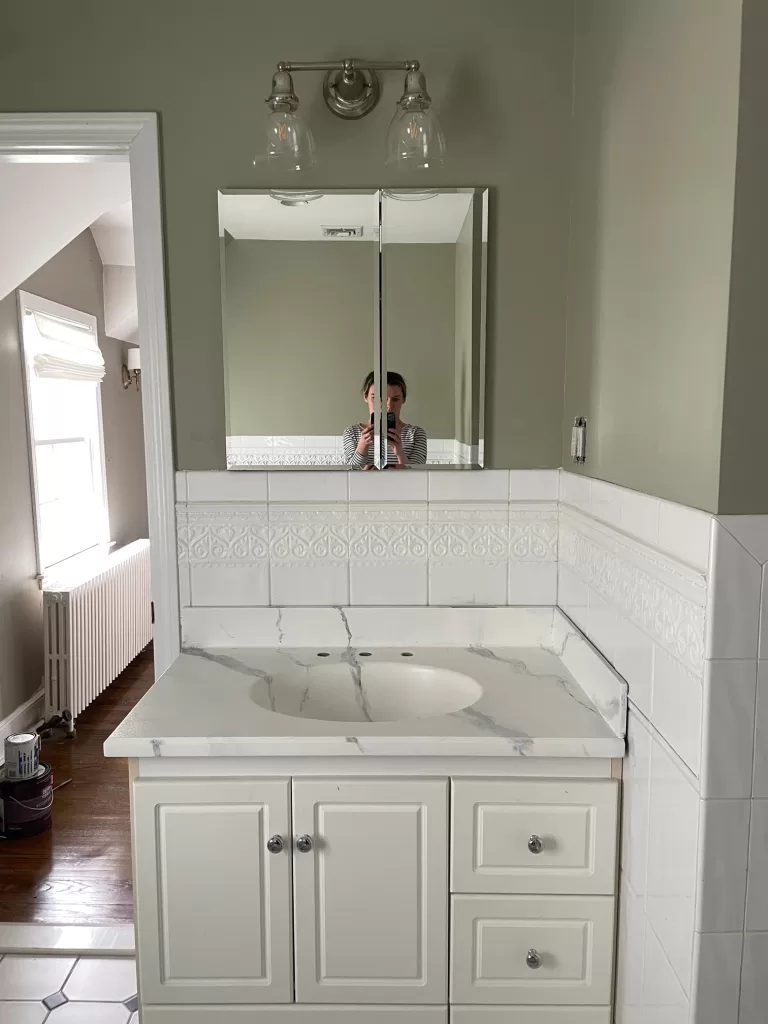
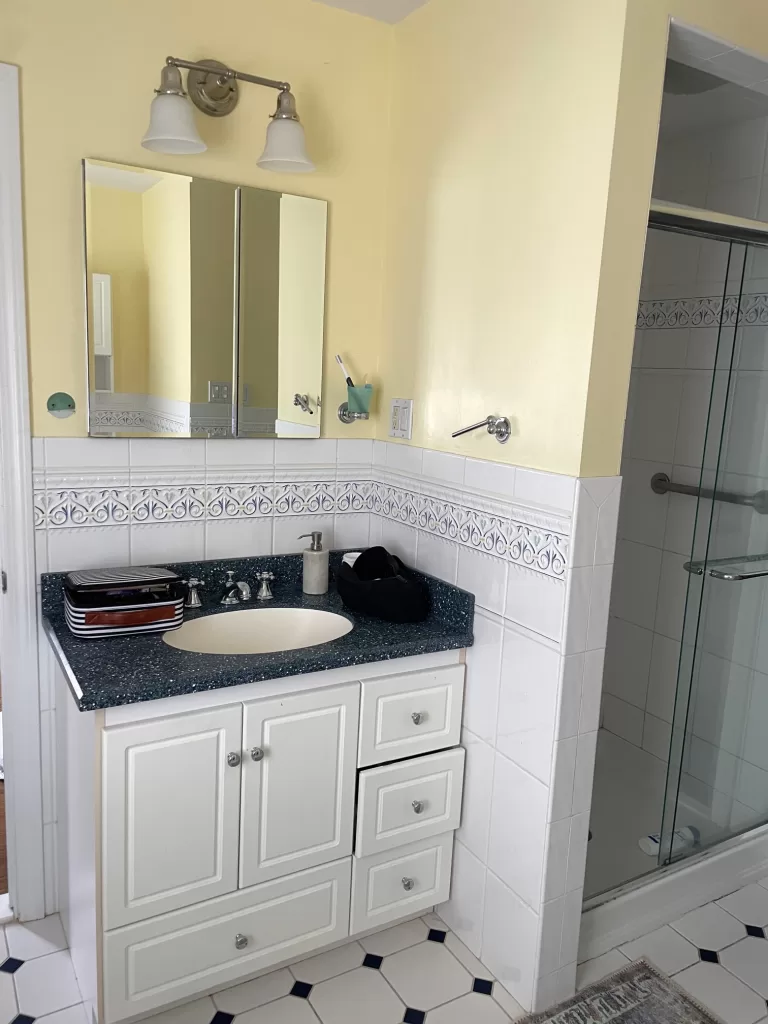
I decided on a whim (ish) that I couldn’t live with our yellow-and-blue primary bathroom anymore. It’s the only room in our house that I haven’t touched since we moved in almost five years ago, because I always knew we’d tear it out at some point, so updating it felt like a waste. But, after gutting much of our first floor in 2022, we’re holding off on major renovations and remodels for the next couple of years. And knowing that, I decided it was time to do something to the bathroom.
Except, I didn’t want to demo anything or buy anything new. So, I started thinking about those DIY marble countertops I’d seen a few years earlier. After watching a few YouTube videos, and browsing some Instagram reels about the process, I decided to give it a go.
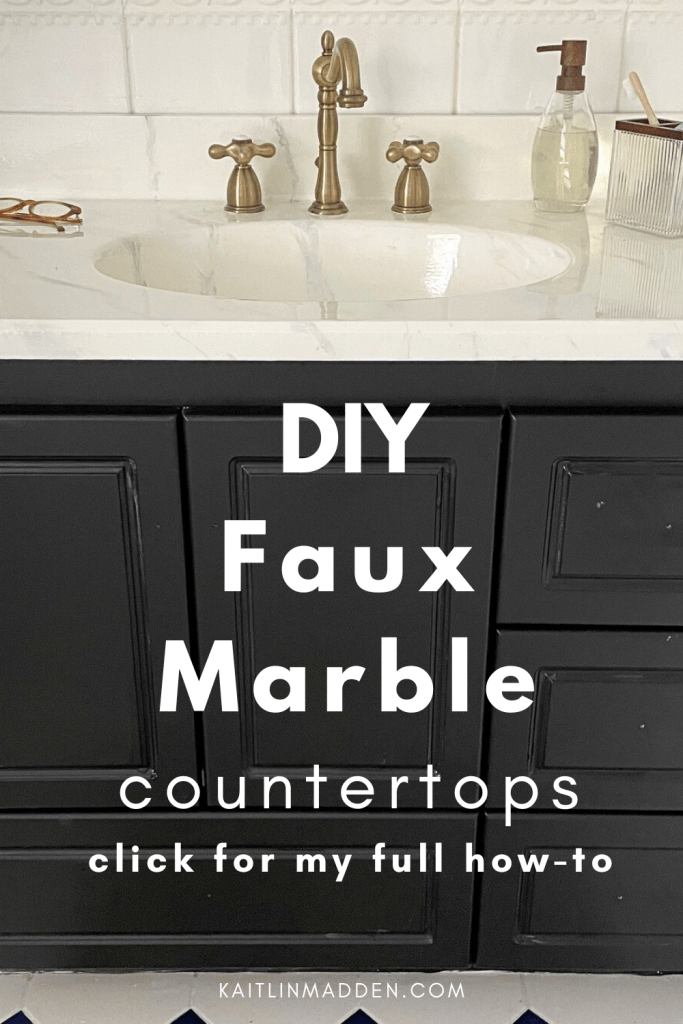
Spoiler alert: It looks good. Like way better than I thought it would. I was very proud of myself when I finished the project.
Thinking about undertaking your own DIY marble countertops makeover? Here’s an overview of how I did it, plus my review of the finished product so far.
DIY Marble Countertops – An overview
To create the faux marble countertop look, you basically paint your counters in a faux marble pattern, and cover the whole thing with epoxy resin, which dries to a hardened finish. The project takes a couple of days because you’ll need to clean, prime, paint, and epoxy, each of which requires some drying/waiting time.
I chose this method after looking into a couple of other methods, including painting the counter with marine paint and using a tile refinishing kit.
I chose epoxy mostly because it seemed like I’d get the most realistic results with the marbling process, but also because I hate products with strong fumes and am super sensitive to smells. Like, I had to move my family out of our home for days when we refinished our floors with a water-based sealant.
The epoxy had almost no strong fumes and I was able to use regular ol’ low-VOC paint underneath.
Sound good so far? Let’s get into the details.
DIY Marble Countertops – What you’ll need

(Here’s my Amazon list with supplies if you prefer to shop all in one spot)
- Sandpaper or orbital sander
- Grout & Tile cleaner or Borax
- CLR (optional)
- Old towels
- Plastic drop cloth
- Painter’s tape
- Small paint roller and foam paint rollers
- Art paint brushes, small and medium sized
- White paint of your choice (I used Benjamin Moore SImply White)
- Black or gray paint (I used this)
- Makeup sponges
- Epoxy resin kit (I used this)
- 2 disposable plastic mixing buckets
- Trowel
- Clean paint brush
- Heat gun
- Acetone or nail polish remover for cleanup
DIY Marble Countertops – Instructions
Step 1: Prep the counters
All of the videos I watched mentioned that preparation was key for this project. To get my counters ready for the epoxy process, I lightly sanded them, and cleaned them with a few different products.
I used my orbital sander and a medium-grit sandpaper to go over my entire countertop and the backsplash. The goal is to rough up the surface a bit, not sand off any finish or color. This part should take you a couple of minutes depending on how big your counter space is. I’d recommend opening a window and pointing a fix fan facing out the window to keep some of the dust at bay.
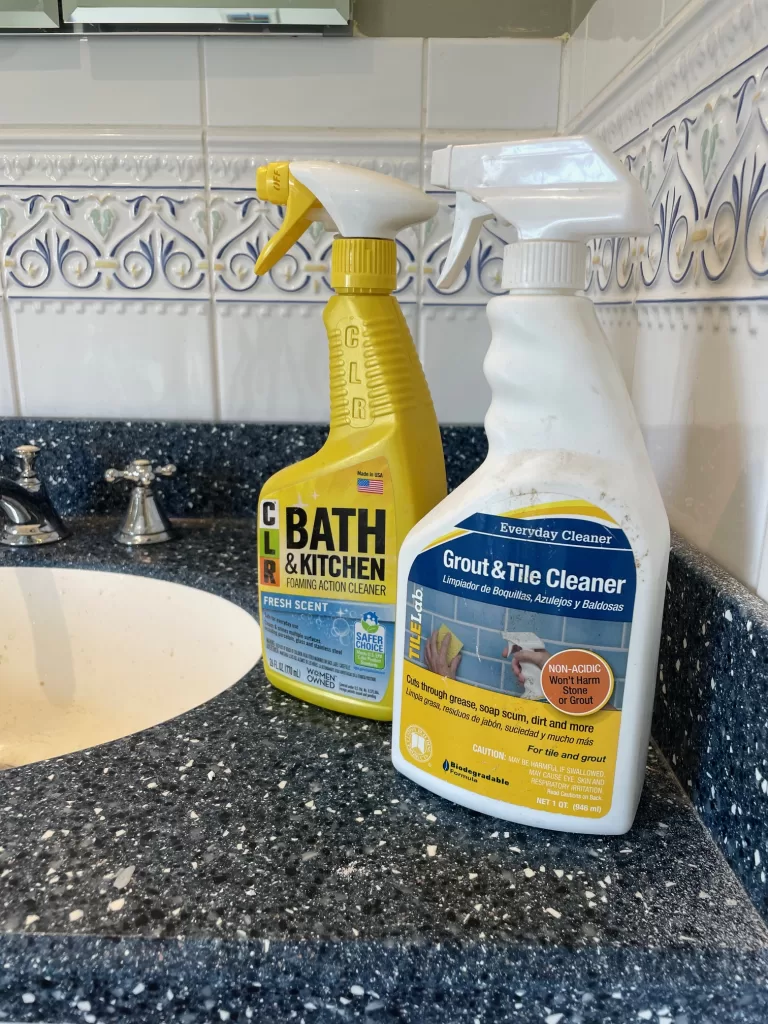
After that, I cleaned the counters. Many of the tutorials I saw suggested a cleaner called TSP. I chose not to use it, though, because it’s pretty toxic stuff. Instead, I used a grout and tile cleaner, and I followed up with CLR on the stubborn spots. Then, I wiped the whole thing down with a damp cloth a few times and let it dry. This did the trick for me. I’ve also heard Borax suggested, but I didn’t use it myself.
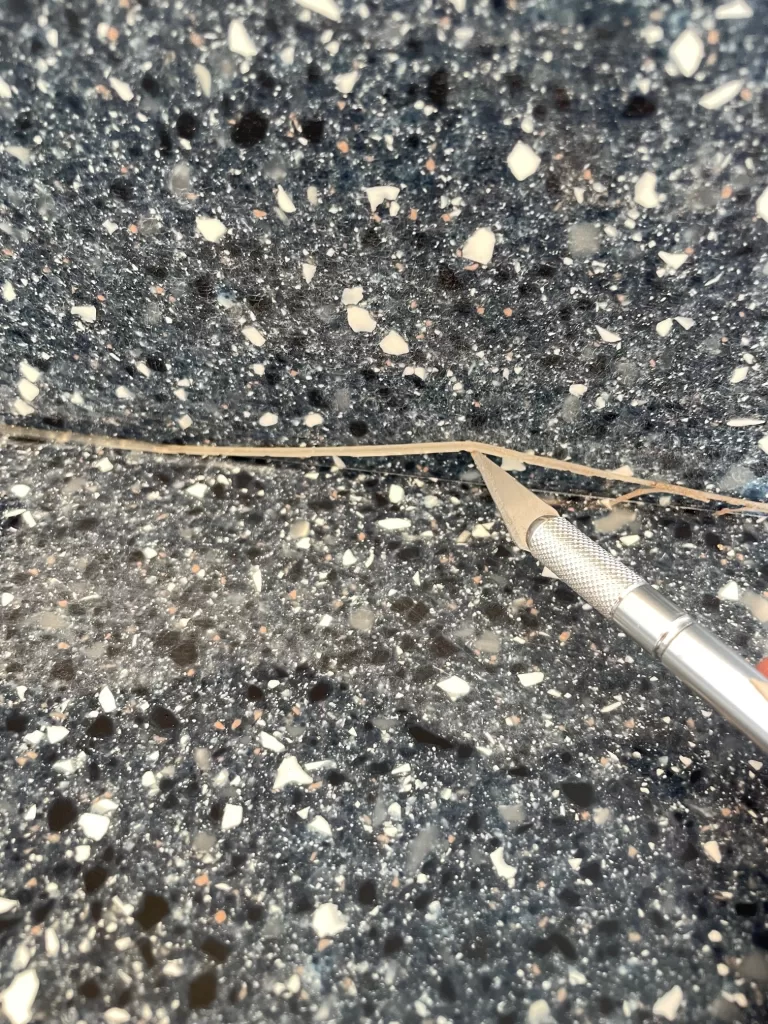
Finally, I cut away any old caulk with an XActo knife, because latex caulk can repel epoxy. I ended up not replacing the caulking because it was only at one point where the backsplash met the countertop, but if you’re working with an area that needs caulk, replace the latex caulk with acrylic caulk.
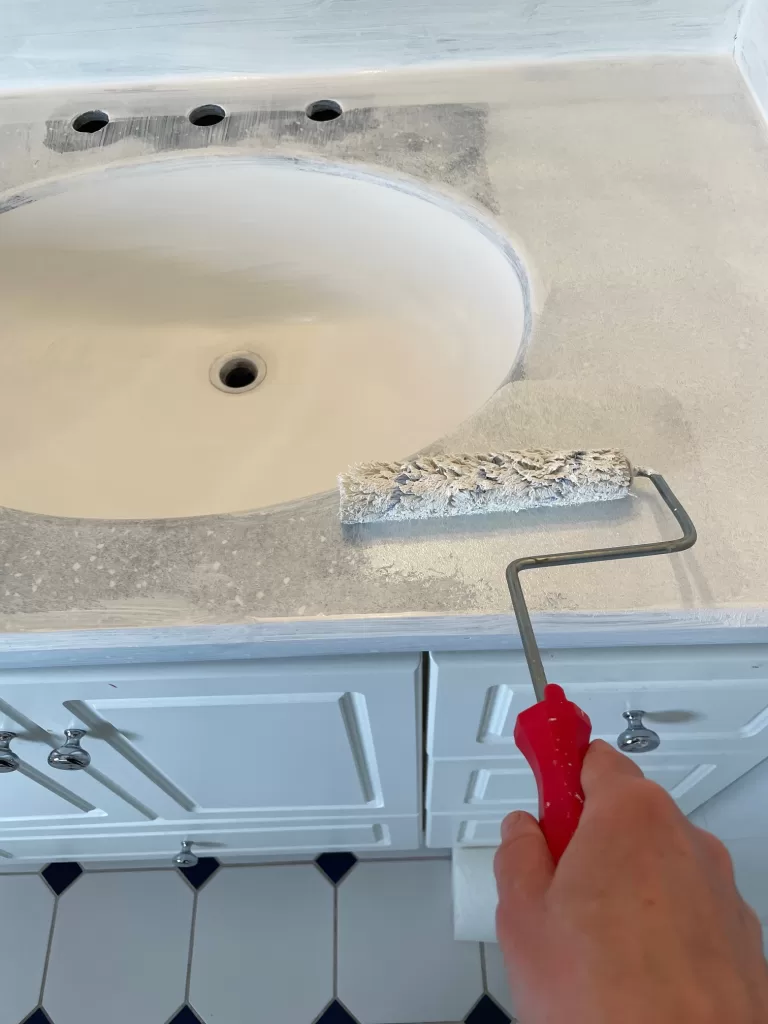
Step 2: Prime
One you’re done cleaning, use a small roller to prime the entire countertop surface. You’ll definitely want to use a bonding primer here. I used Zinsser 1-2-3 because that’s just what I’ve always used in the past, but I’ve also heard good things about Stix.
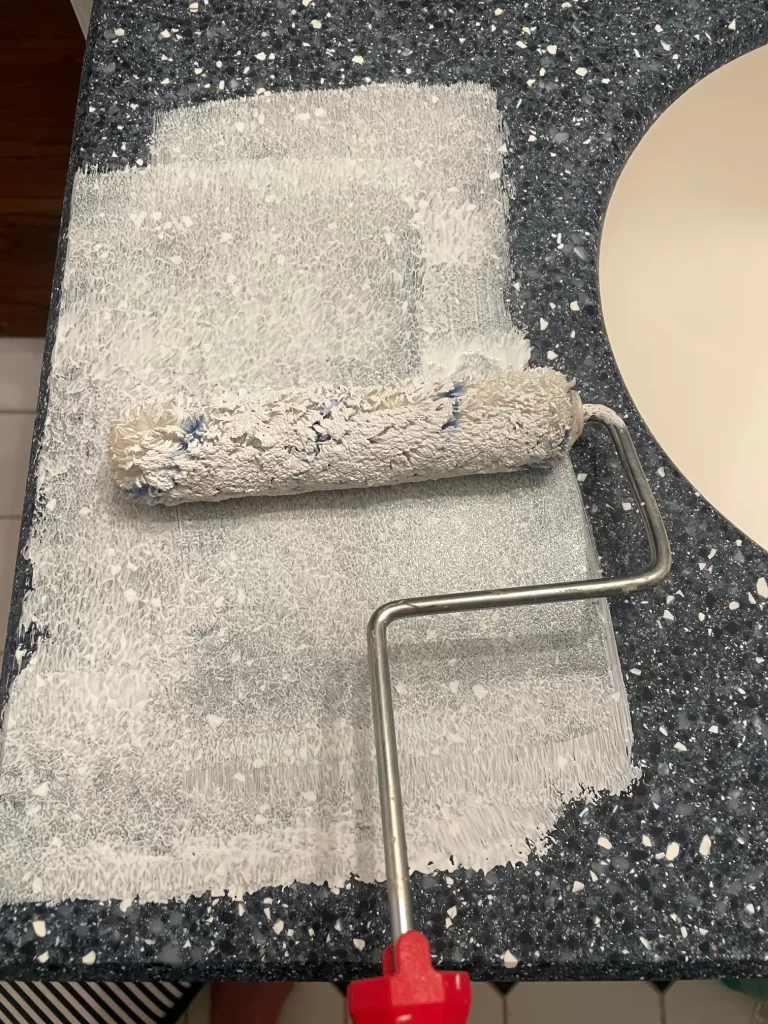
Step 3: Paint your base color
When the primer is dry, it’s time to start painting your “marble” base color. I used Benjamin Moore Simply White, because, again, that’s what I had on hand. I used my small paint roller, and needed two coats. I probably could have done three, but I figured a little imperfection and color variation might add to the authenticity of the marble look.
Step 4: Paint the marble lines.
For the marble effect, there are a number of approaches you can take, and I tried a few.
To make the larger veins, I mixed a slightly darker shade of gray using black and white paint, and I brushed it onto the countertops with a larger art paint brush before the white base coat was totally dry. I did this in order to mix the paints together a bit and create a marbleized effect. I ended up painting on the dark gray, and then smudging it with white paint and my fingers (very technical I know).
**A couple of things I suggest here to help with making your DIY marble countertops look realistic.
The first is to watch a bunch of YouTube videos. I found a few different techniques for things like holding the paint brush and smudging the lines and I ended up using a few of them. It’s good to have lots of tools in your DIY arsenal.
The second is to find photos of marble patterns you like and have them on hand for inspiration while you paint. I tried to copy a photo I found online for my sink.
After I had a pattern that looked natural-ish, I decided the veins were too harsh, so I let the paint dry and then painted over the whole countertop lightly with another coat of white paint using a small foam roller. I didn’t apply a ton of pressure, because my goal was not to cover up the veining, but just make it more subtle and give the counter some depth.
This was a game changer!
Once the white paint dried, I mixed a slightly lighter shade of gray paint, and went back over the sink adding thinner veining. I smudged these lines using a damp makeup sponge.
When I had a pattern I was happy with, I resisted the urge to keep going add more lines, and let the whole thing dry.
Step 4: Epoxy
Once you have a marble design you’re happy with, it’s time to pour the eopxy. This step goes fast, so be sure you’ll have an uninterrupted hour to work, and that you have everything you’ll need on hand.
Start by prepping your space – I taped plastic drop cloth under the countertop to cover my vanity and some of the floor to catch drips. There will be drips.
Then I started mixing the epoxy.
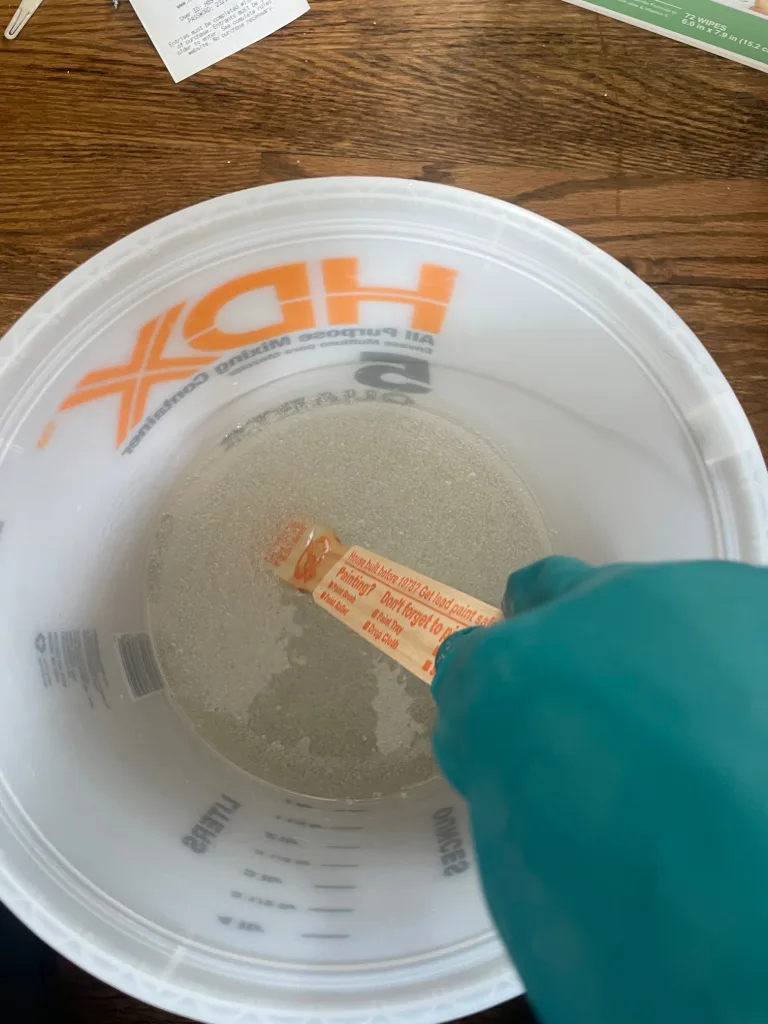
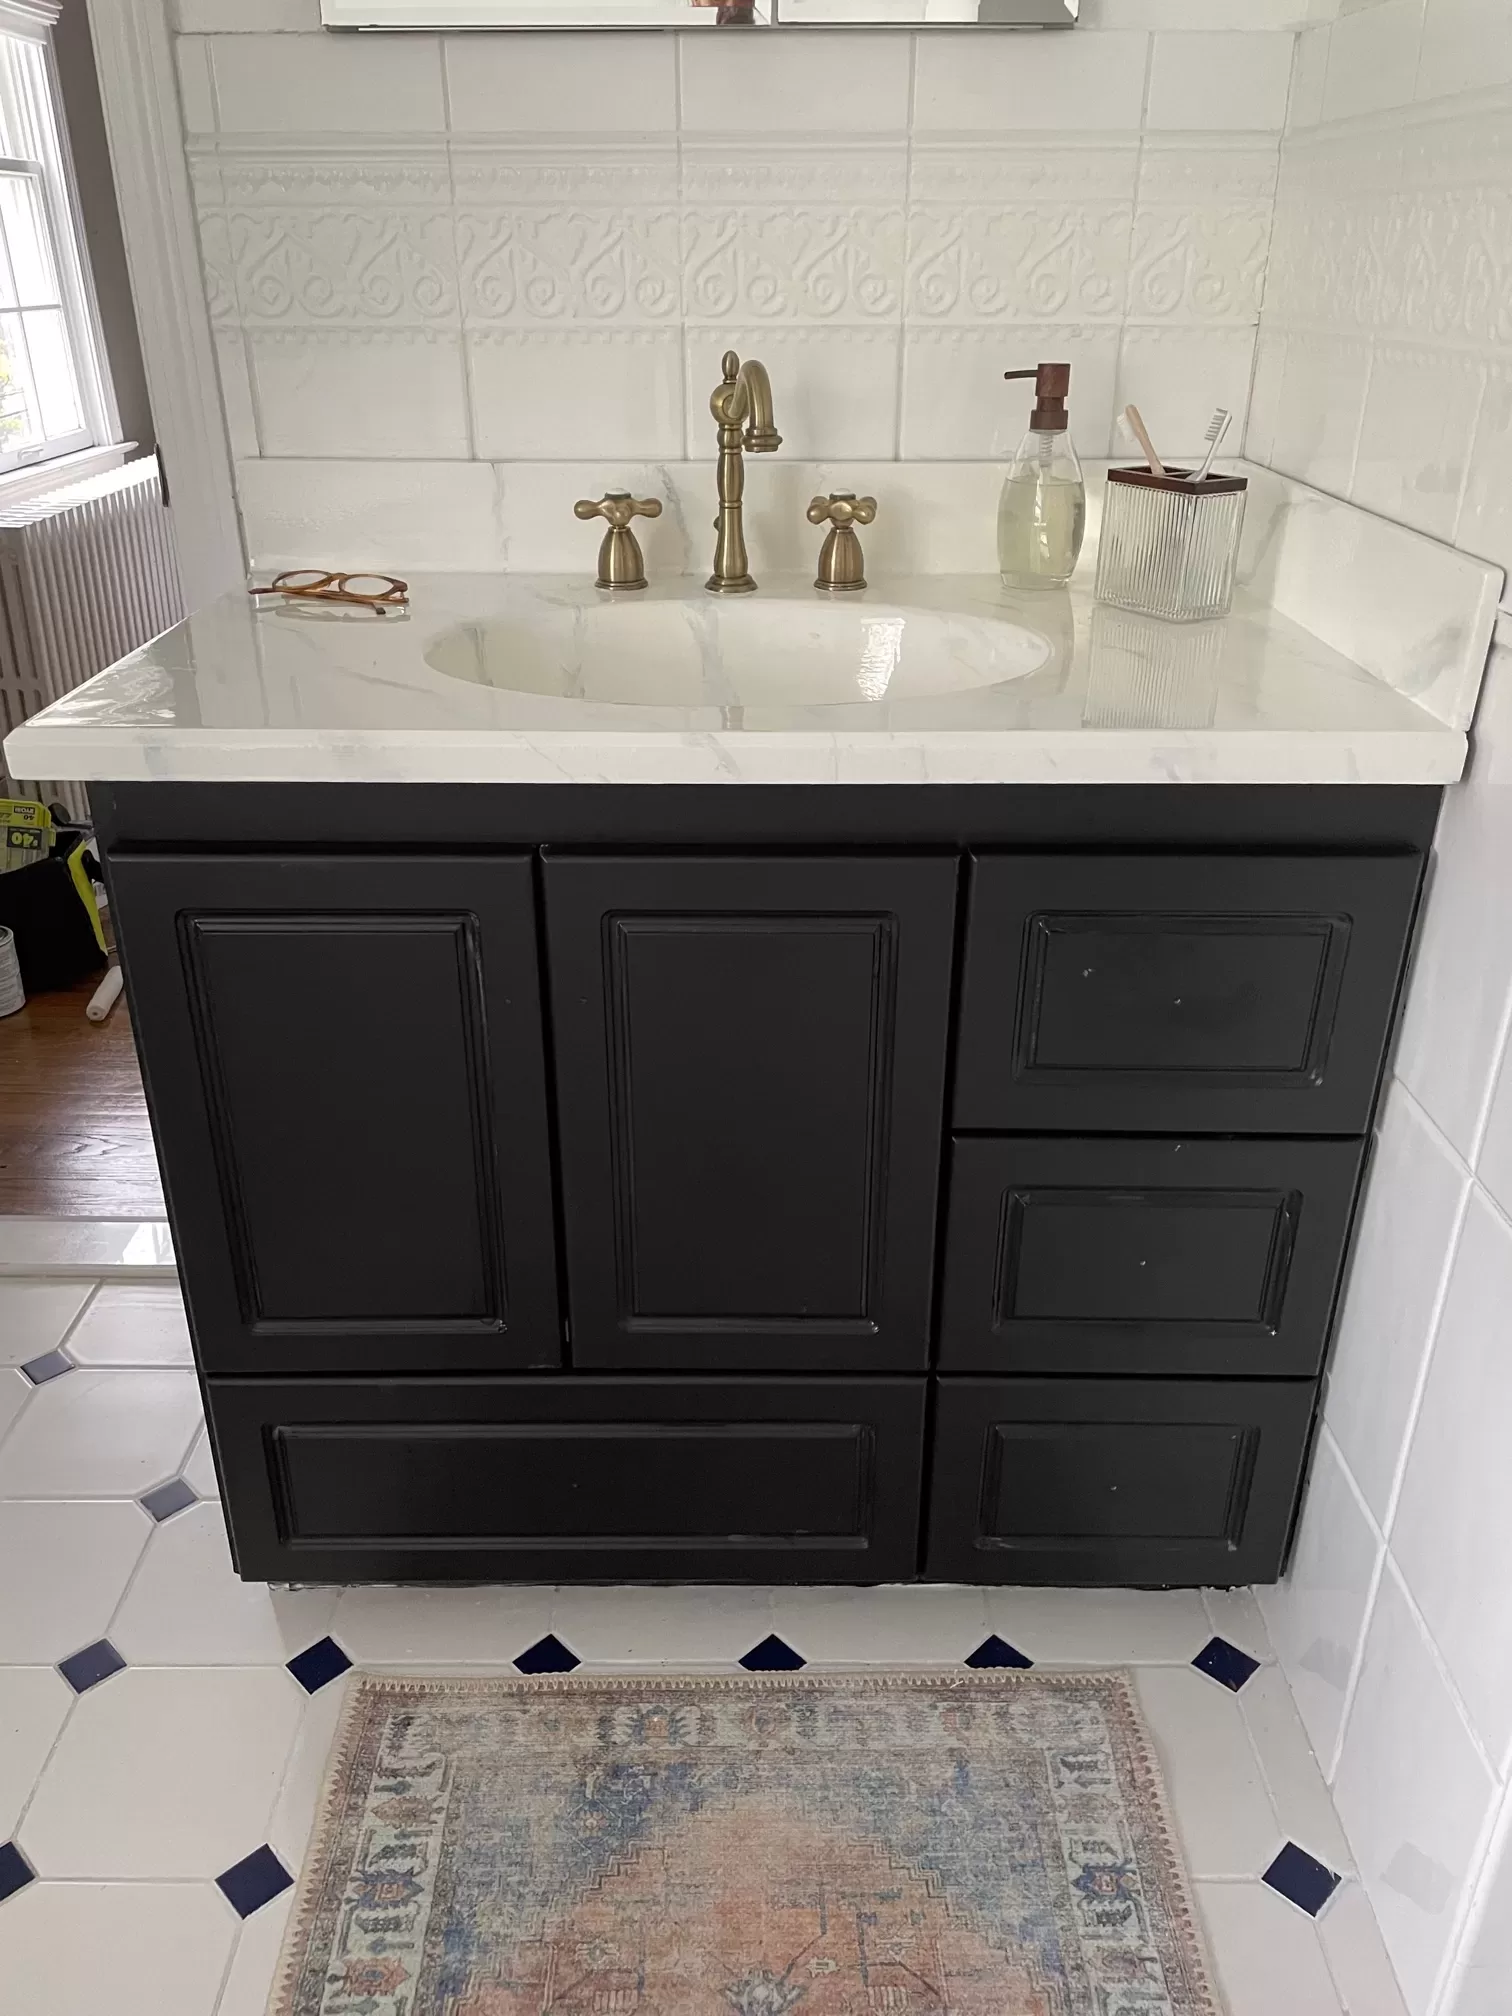
I bought an epoxy kit that made 1 quart of epoxy, and had about twice what I needed for my 36″ vanity, including the sink.
Every epoxy kit will have slightly different instructions, so be sure to read yours closely first.
Here’s what I did for the kit I used.
First, I mixed the epoxy and hardener in a plastic bucket for 6 minutes, per the directions. I used a paint stirrer because that’s what the instructions suggested. Then, I poured the mixture into a new plastic bucket, and stirred for an additional six minutes.
Then, I was ready to pour.
I poured about a cup of epoxy onto one side of the counter, then used my trowel to move it around and smooth it out. Then, I repeated this on the other side of the sink until everything was covered.
Next I went over the whole sink with my clean paintbrush, making a dabbing motion, to eliminate trowel lines. Once this was done, I dipped the brush into epoxy, and painted it onto the backsplash and the edges of the countertop.
Then I looked at the counter from lots of angles and with the lights on and off to make sure I covered everything adequately and there were no obvious runs or drips.
Once you’ve covered the whole countertop area with epoxy, it’s time to plug in your heat gun .
You want to go over the entire surface a few times with a heat gun or blow torch, waiting a minute or so between each pass so the epoxy doesn’t overheat. The heat smooths out any air bubbles in the epoxy from the mixing process. (At least, it’s supposed to. Despite going over my sink multiple times with a heat gun, I still had some air bubbles. You can only see them at certain angles, and they don’t ruin the overall effect of the countertop, but they are there.) This might be my error because it was the first time I did this, but just sharing in the interest of transparency.
Once I heat-gunned, I waited, and checked on the counter every 20 minutes or so for a few hours to brush away drips from the counter edges. (There will be drips, so check back!)
Step 5: Cleanup & curing
As soon as you’re done with the heat gun, you’ll want to start cleaning up. Epoxy gets harder to clean the more it cures. Just run a cotton ball or paper towel soaked with acetone or nail polish remover over any areas that need to be cleaned up. I did this on my trowel and my hands, but ended up just throwing away the paintbrush and buckets I used.
Once you’ve cleaned up, you’ll want to wait at least 72 hours before placing anything on your countertop.
DIY Marble Countertops – How much did they cost?
I had a bunch of the supplies on hand, including paint, the sander, primer, paint brushes and rollers.
I had to buy the epoxy kit, heat gun, disposable buckets, plastic drop cloths, and makeup sponges, and the total cost was around $90. Not bad for a whole new counter.
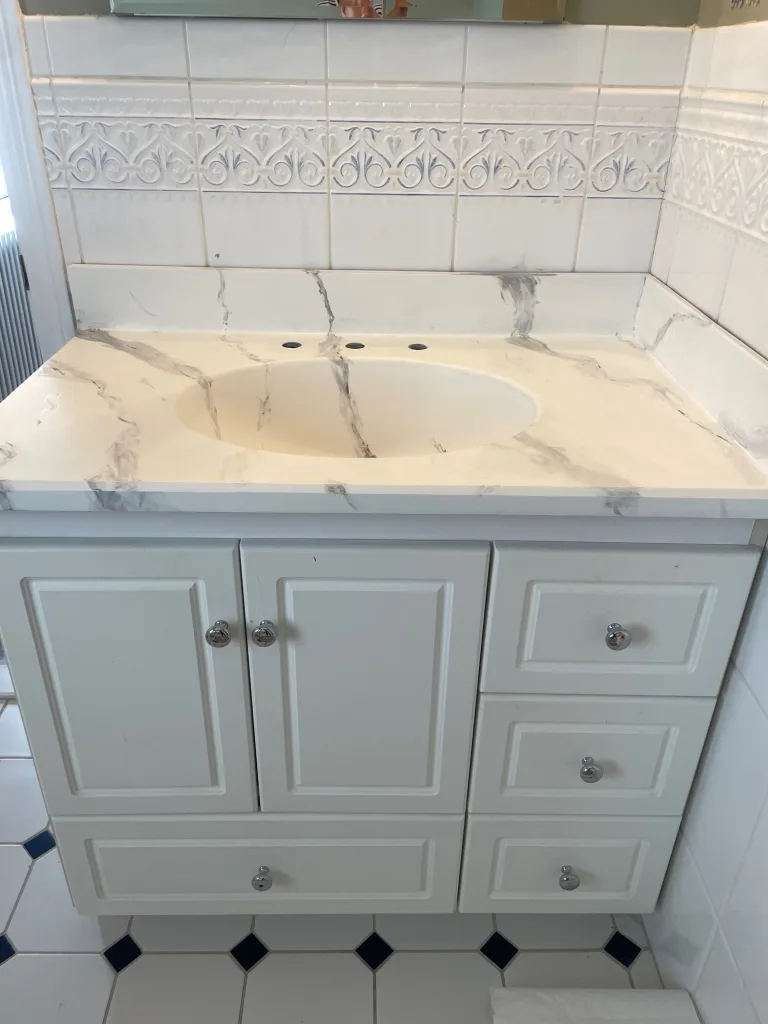
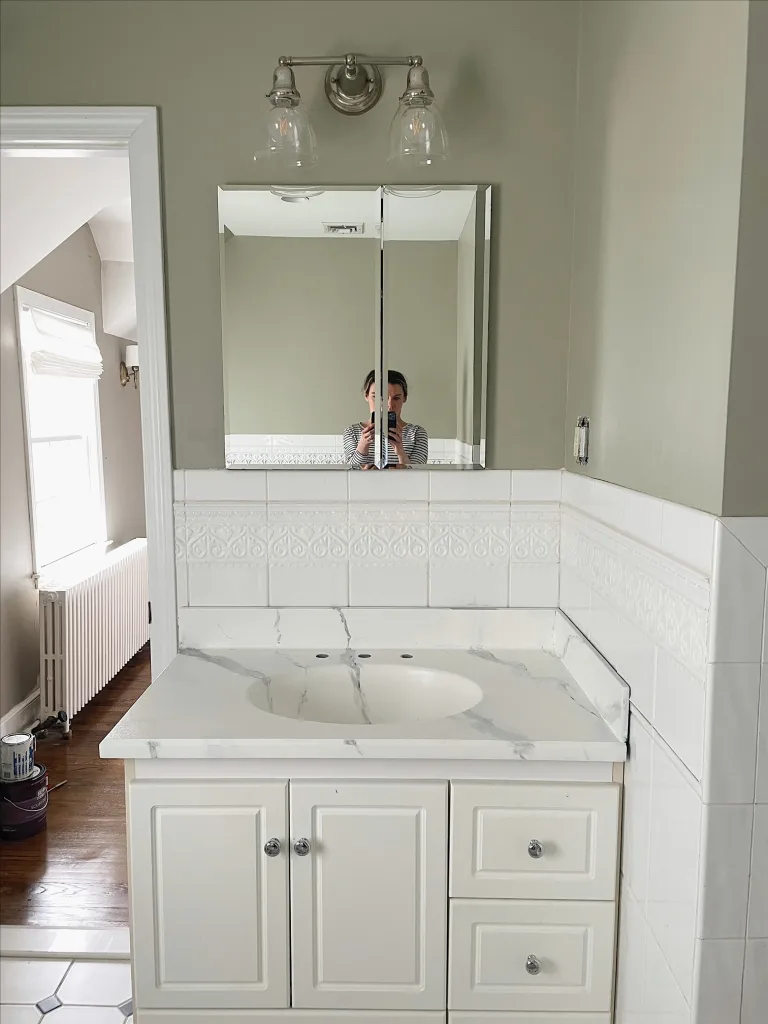
How realistic do faux marble countertops look?
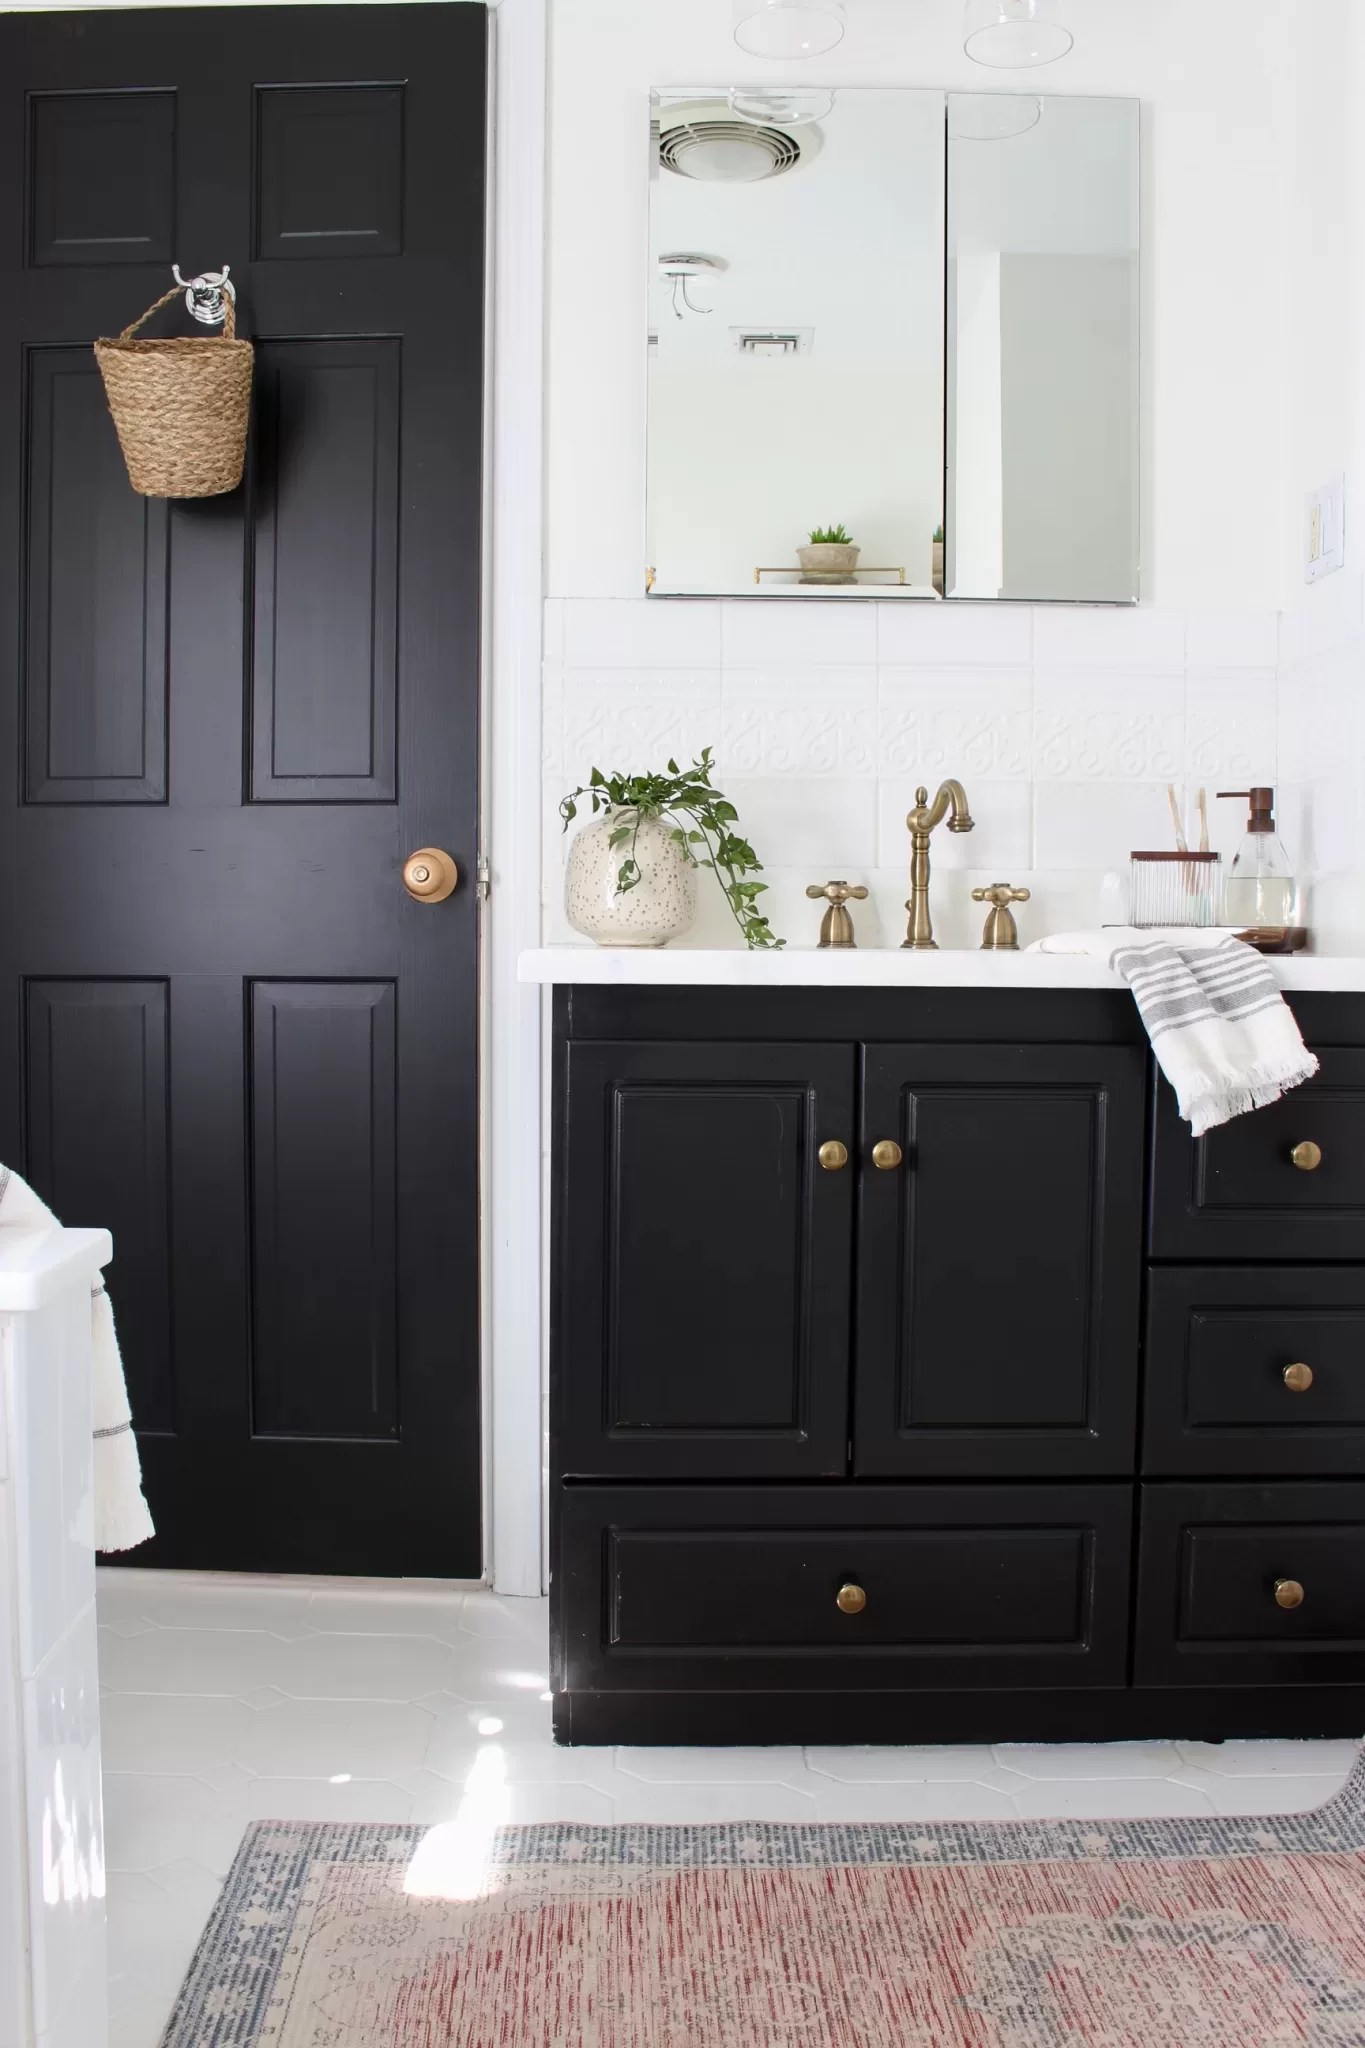
Before I started on my DIY marble countertops, I almost chickened out because my husband told me it would look like a ’90s hair salon. At the end of the process, he took it back, and couldn’t believe how realistic it actually looked.
From up close or if you touch the counter, you can tell the counter isn’t real marble, but even a couple of feet away it’s hard to tell the difference.
How long did it take?
Overall, it took me 3 days to complete the countertop process. I cleaned and primed on day 1, did the painting on day 2, and the epoxy on day 3. This is a good timeline because it allows everything to dry properly.
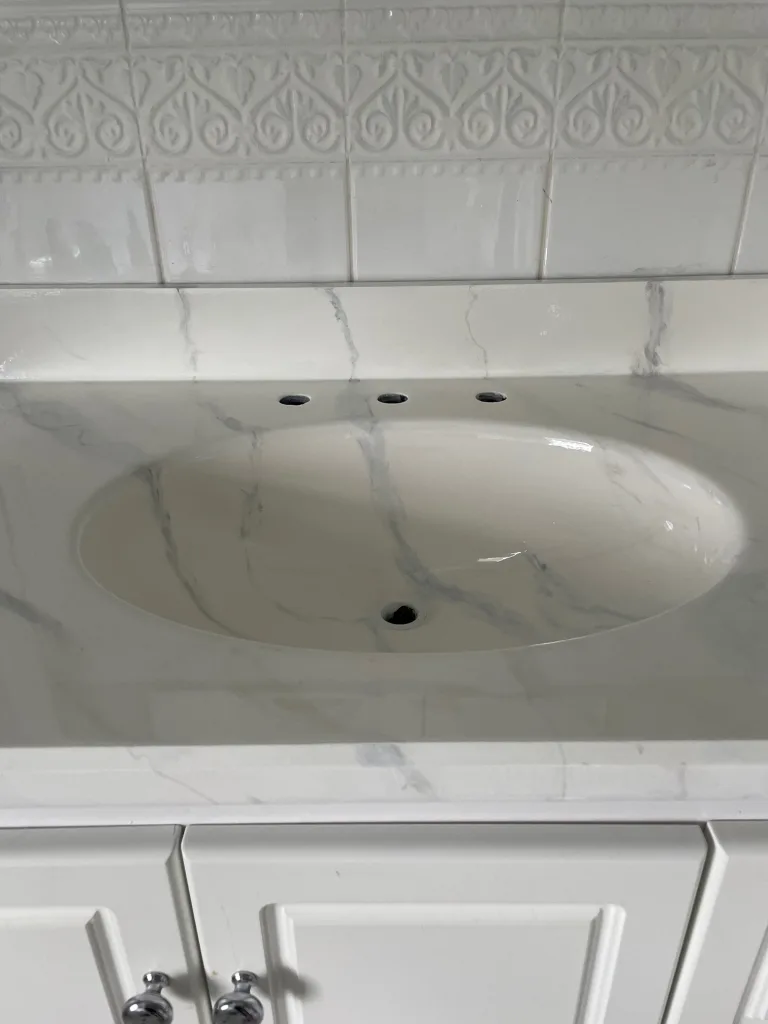
DIY marble countertops: Final Verdict
Overall, I’d give this project an 8.5/10. I love the final look and would 100 percent do it again.
The only reason it’s not a 10 for me is because I found it hard to get some of the air bubbles out of the epoxy, and there are certain spots that dried with runs and drips (this is my fault for not being more fastidious during the drying process, but still).
Even so, my counters look 1000x better than they did. So if you have a super-ugly countertop that’s 30 years old, you really have nothing to lose in my opinion.


7 Comments