Bathroom Vanity Makeover: How I Upgraded Our 1990s Bathroom Vanity for Under $100

Would you like to save this?
Time for a One Room Challenge Update! After I DIYed faux marble countertops last week (one of my favorite DIYs of all time), this week I focused on finishing up my bathroom vanity makeover. I also installed a balloon shade … and, in the middle of this project, I ended up making a change to the wall color, too!
Let’s review.
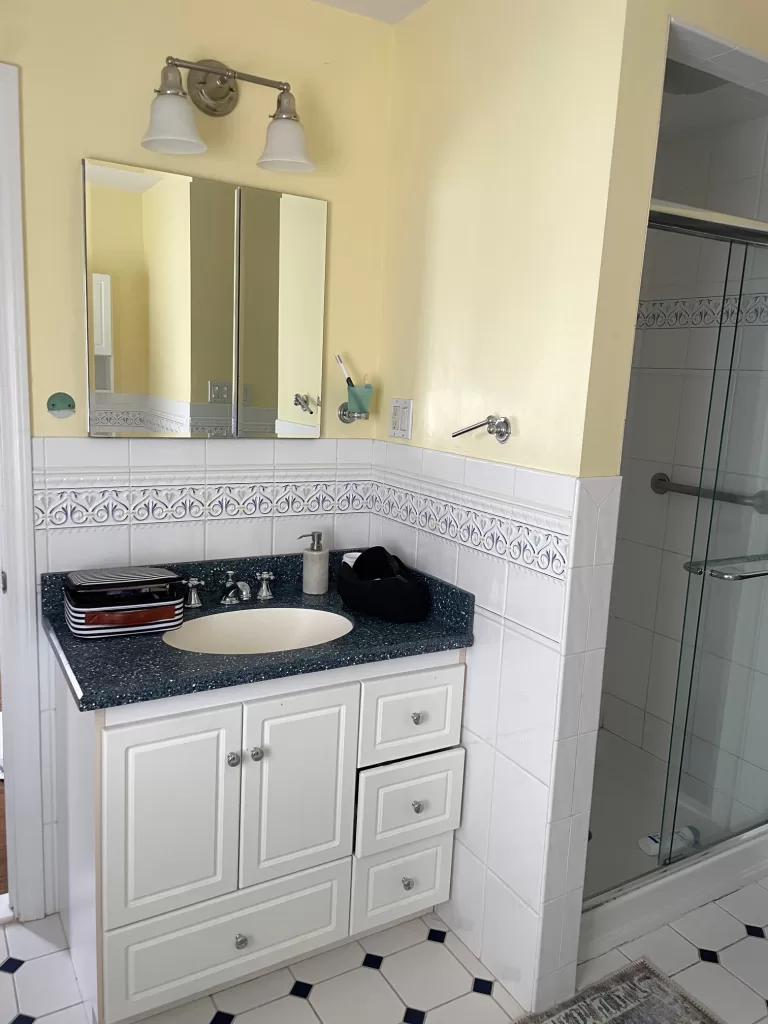
After the first week, here’s what the vanity area looked like. Note the frosted glass shade and blue vanity top.

And here’s what the area looked like after I switched out the glass shades on the vanity light, and epoxied the countertops, but before I started painting the vanity.

At this point, my plan was to paint the vanity black and move on from my bathroom vanity makeover to the next part of the project. But as I stared at the bathroom color palette, it didn’t feel right. In the context of the room, which still had its frilly details on the wall tile, and plenty of dated elements, this sagey-green color didn’t feel fresh. It still felt dated.
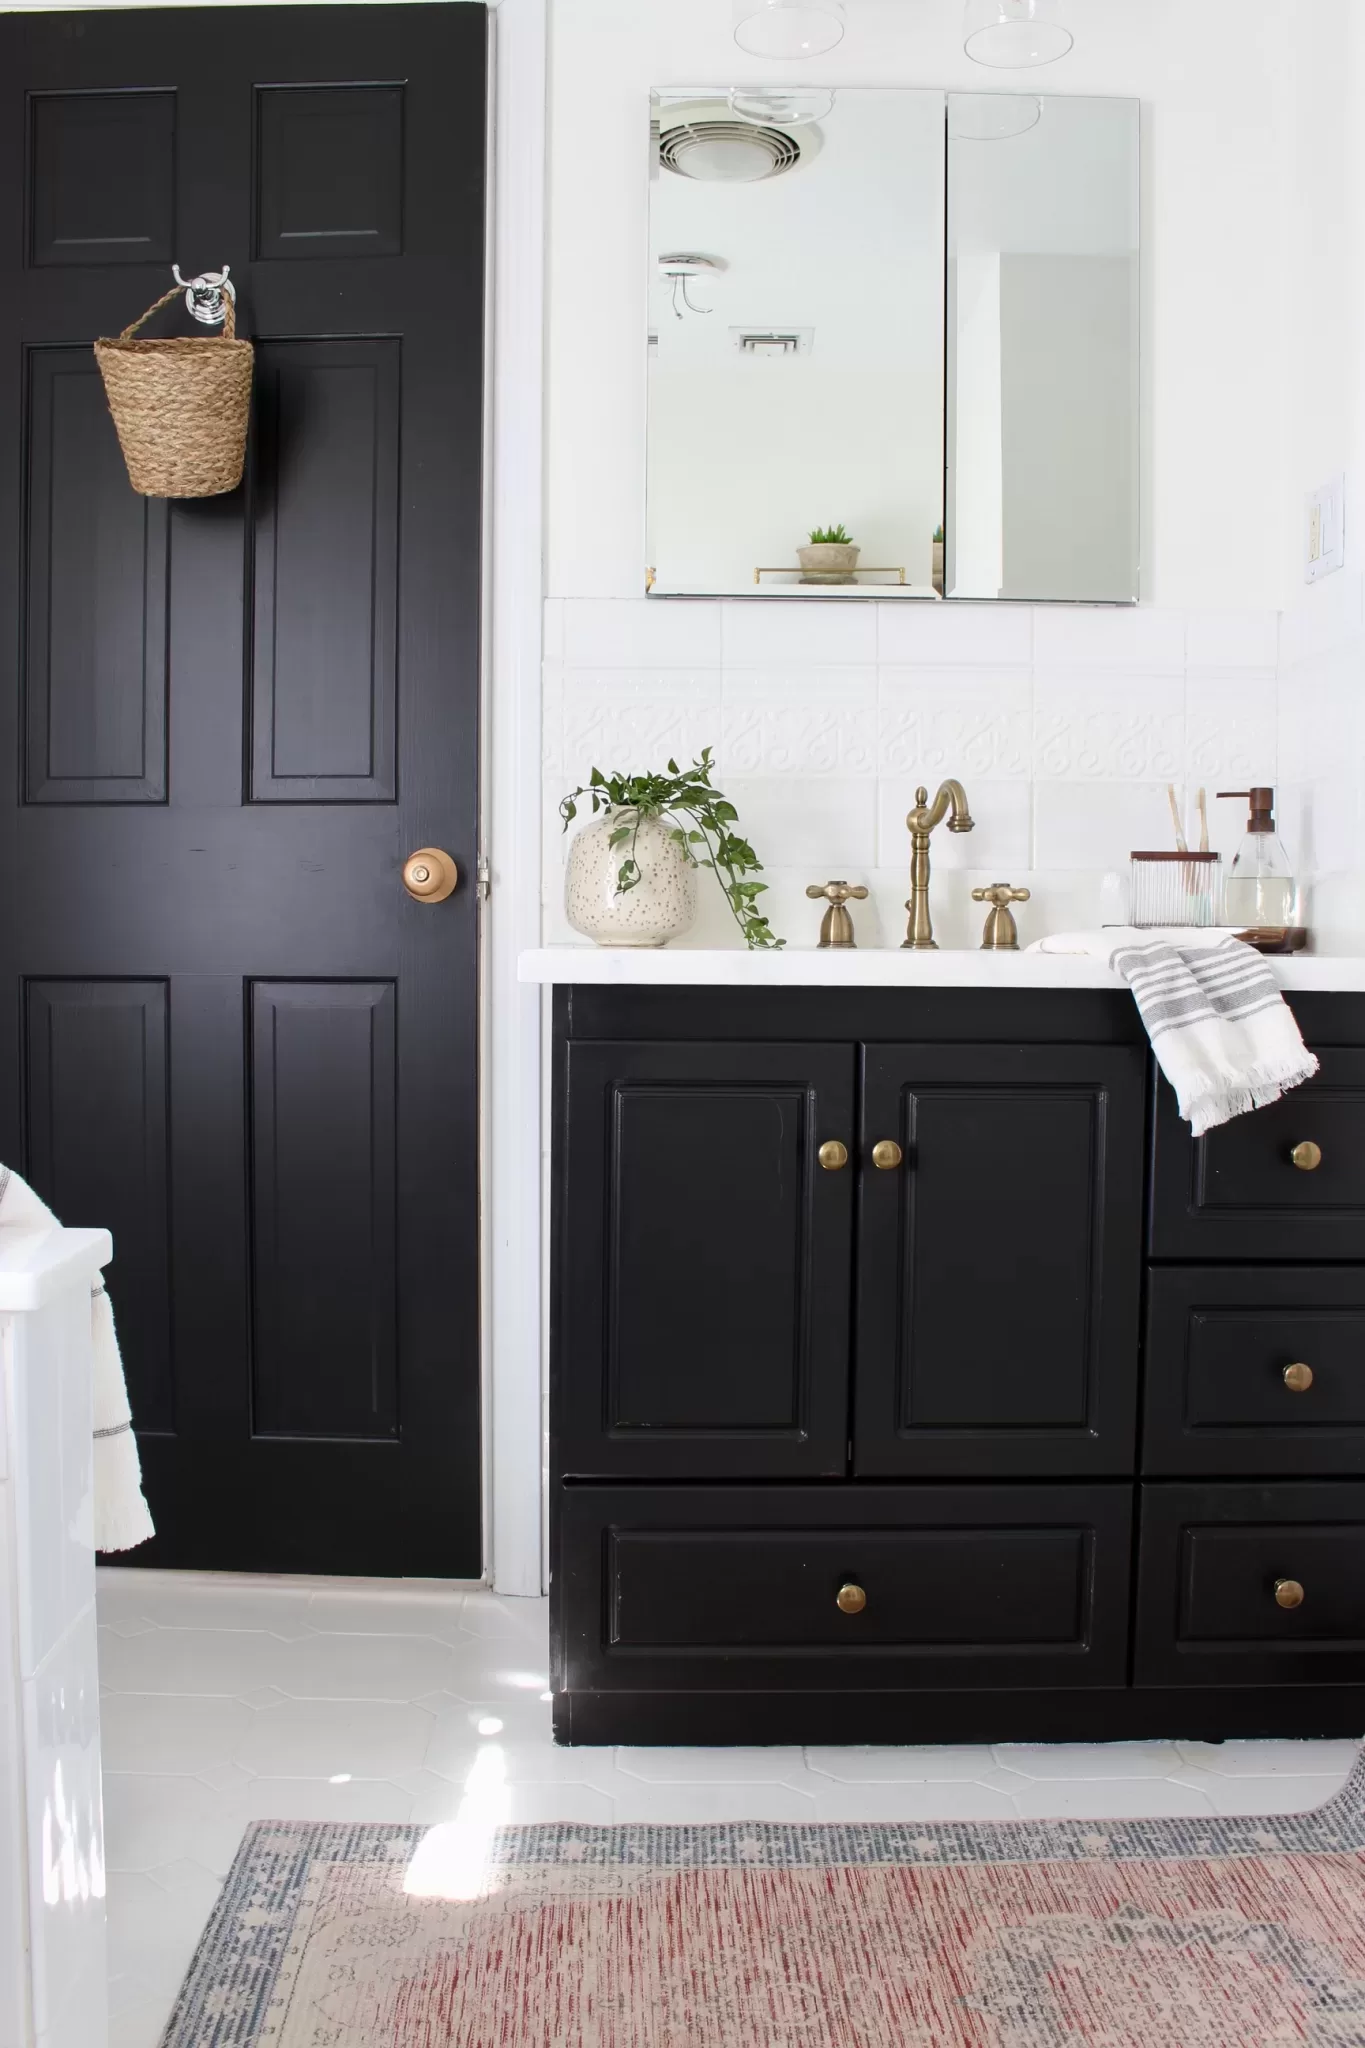
SO. I decided to paint the walls white, and then stick with the black vanity. I also decided to paint the back of the interior doors black, too, to add some dimension to what would otherwise be an all-white room. I always find that the best way to make a dated space feel more modern is a high contrast white-and-black color palette. It makes everything feel more classic.
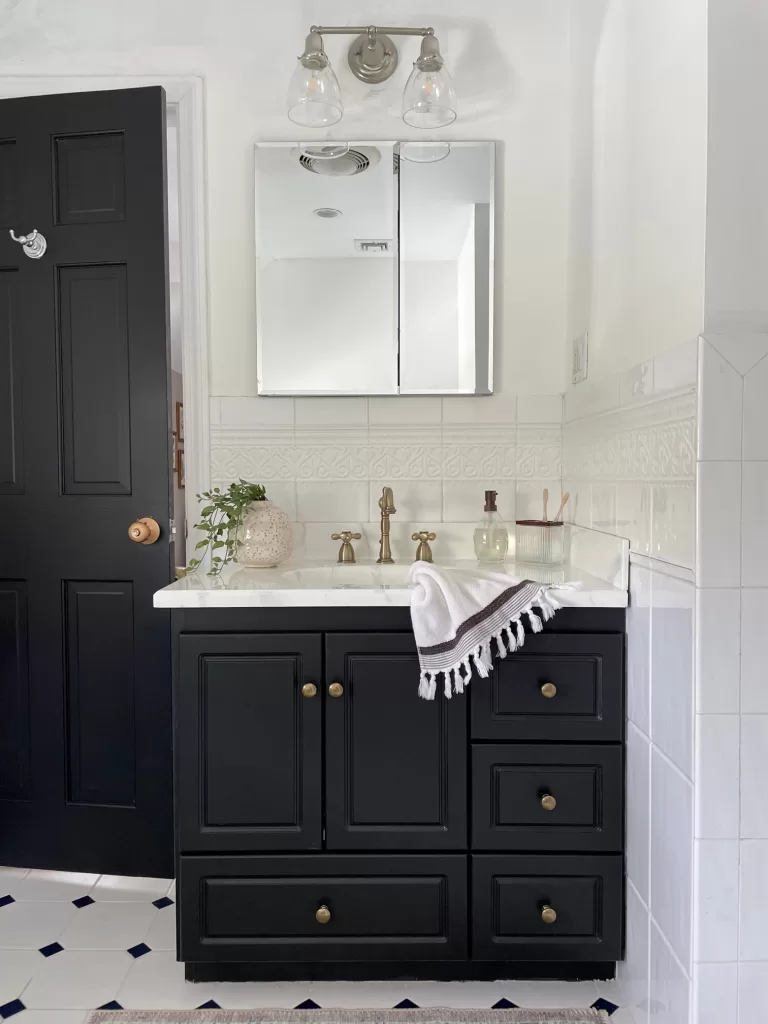
Here’s the vanity after I painted it black:

And let’s just take a moment to reflect on where we started:
So, after I painted the vanity, I got to work re-painting the room in Benjamin Moore Simply White, my go-to white paint color.
When the vanity was dry, I added new drawer pulls, which I bought on Amazon for $2 each, and they match the faucet almost perfectly.
I feel much better about the whole vibe now!
If you’re thinking about painting your bathroom vanity, here are some of my tips:
Painting a bathroom vanity: Tips
A bathroom vanity makeover isn’t quite as simple as slapping on a coat of paint, but it’s almost that simple. Here’s my process for painting mine.
- Lightly sand the whole thing, then wipe it down with a sponge and soapy water.
- Once it’s dry, add a coat of primer. I used Zinsser 123, but I also like Zinsser BIN if you want something with a little more bonding power. I also removed the vanity drawrs for the painting part, but I left the doors on. Removing the drawers makes things a lot easier.
- When the primer is dry, add two-three coats of paint. I used three because of the dark color.
- Once the paint is dry, I added three coats of water-based polyurethane, mostly because the bathroom is a wet-room, and I know lots of toothpaste and face wash and hair product will probably accidentally find their way onto the vanity. Did I mention our kids bathe in our primary bathroom tub? Fun.
- Finally, I put on the new hardware.
That’s it! It’s a pretty simple project!
My next steps in the One Room Challenge are:
- Make simple shelves
- Hang the new pendant light
- Paint the floor tile
- Paint the floral tile pattern in the shower trim ( a part I’m scared about!).
Don’t forget to check out what the other ORC featured and guest participants are up to each week on the One Room Challenge blog!


![The best Amazon home decor [2023] Plus how to find it](https://kaitlinmadden.com/wp-content/uploads/2022/08/home-decor-on-amazon.png)